Day 36: Navigating Kubernetes - Conquering Persistent Volumes! 💡
Hello DevOps Champions! 🚀 Yesterday, we soared through the realms of ConfigMaps and Secrets in Kubernetes, and today, we're fueling the fire by mastering the art of Persistent Volumes (PVs). 🔥
Understanding the Backbone: Persistent Volumes in Kubernetes
In the Kubernetes universe, Persistent Volumes are the backbone of data storage. Provisioned by administrators, a Persistent Volume (PV) is a dedicated storage piece within the cluster. A user's request for storage is materialized through a Persistent Volume Claim (PVC), referencing a specific PV bound to a particular node. Dive deeper into the official documentation of Persistent Volumes to solidify your understanding.
⏰ Attention #90DaysDevOps Challengers:
Before immersing ourselves in today's task, take a moment to share your thoughts on the #90DaysDevOps challenge. Your valuable feedback helps us enhance your learning experience. Fill out the feedback form here. Your participation and support mean the world to us. Let's continue growing together! 🌱
🚀 Today's Hands-On Tasks:
Task 1: Adding a Persistent Volume to Your Deployment Todo App
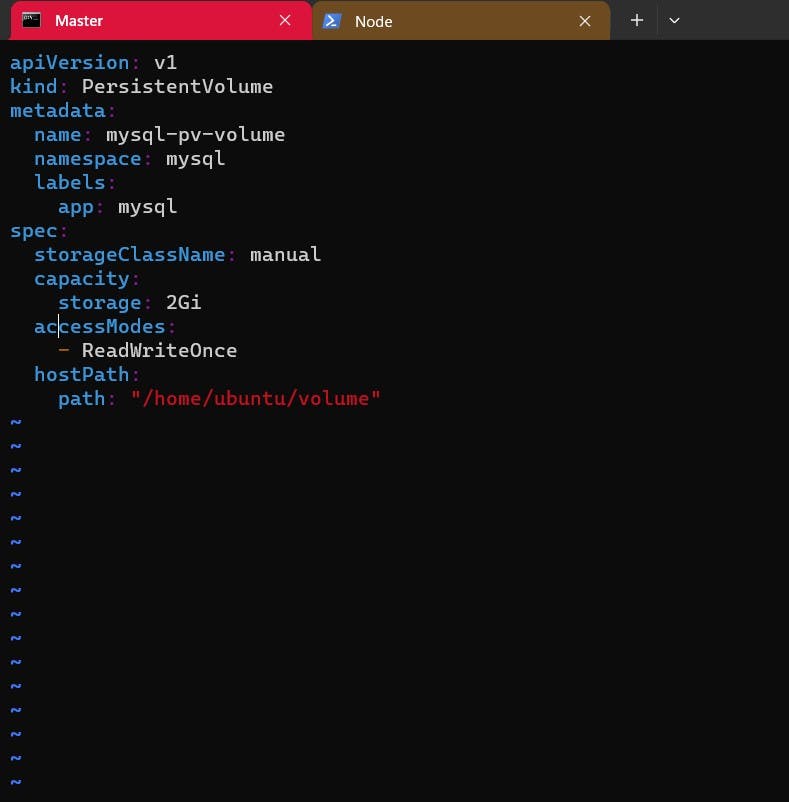
Create a Persistent Volume (PV):
- Define a Persistent Volume to anchor your application's data. Use the provided template for guidance.
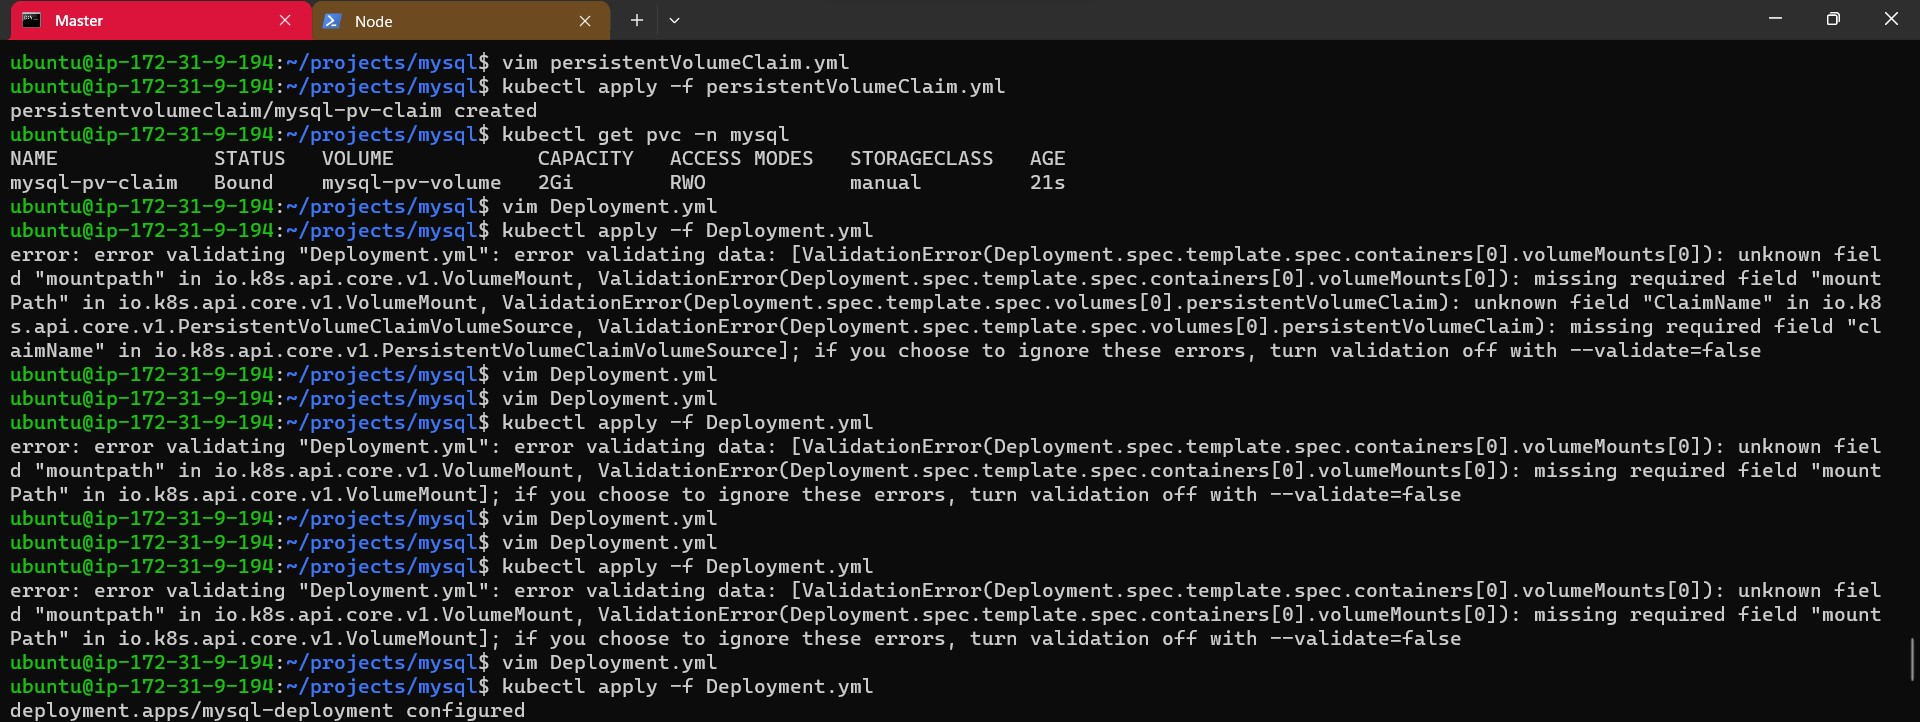
Create a Persistent Volume Claim (PVC):
- Craft a PVC that references the previously defined Persistent Volume.
Update Deployment Configuration:
- Infuse your deployment.yml file with the Persistent Volume Claim. After applying pv.yml and pvc.yml, your deployment file should resemble the provided template.
Apply Changes:
- Execute
kubectl apply -f deployment.ymlto implement the updated deployment.
- Execute
Verification:
- Confirm the successful addition of the Persistent Volume by checking the status of Pods and Persistent Volumes in your cluster using
kubectl get podsandkubectl get pv.
- Confirm the successful addition of the Persistent Volume by checking the status of Pods and Persistent Volumes in your cluster using
Task 2: Accessing Data in the Persistent Volume
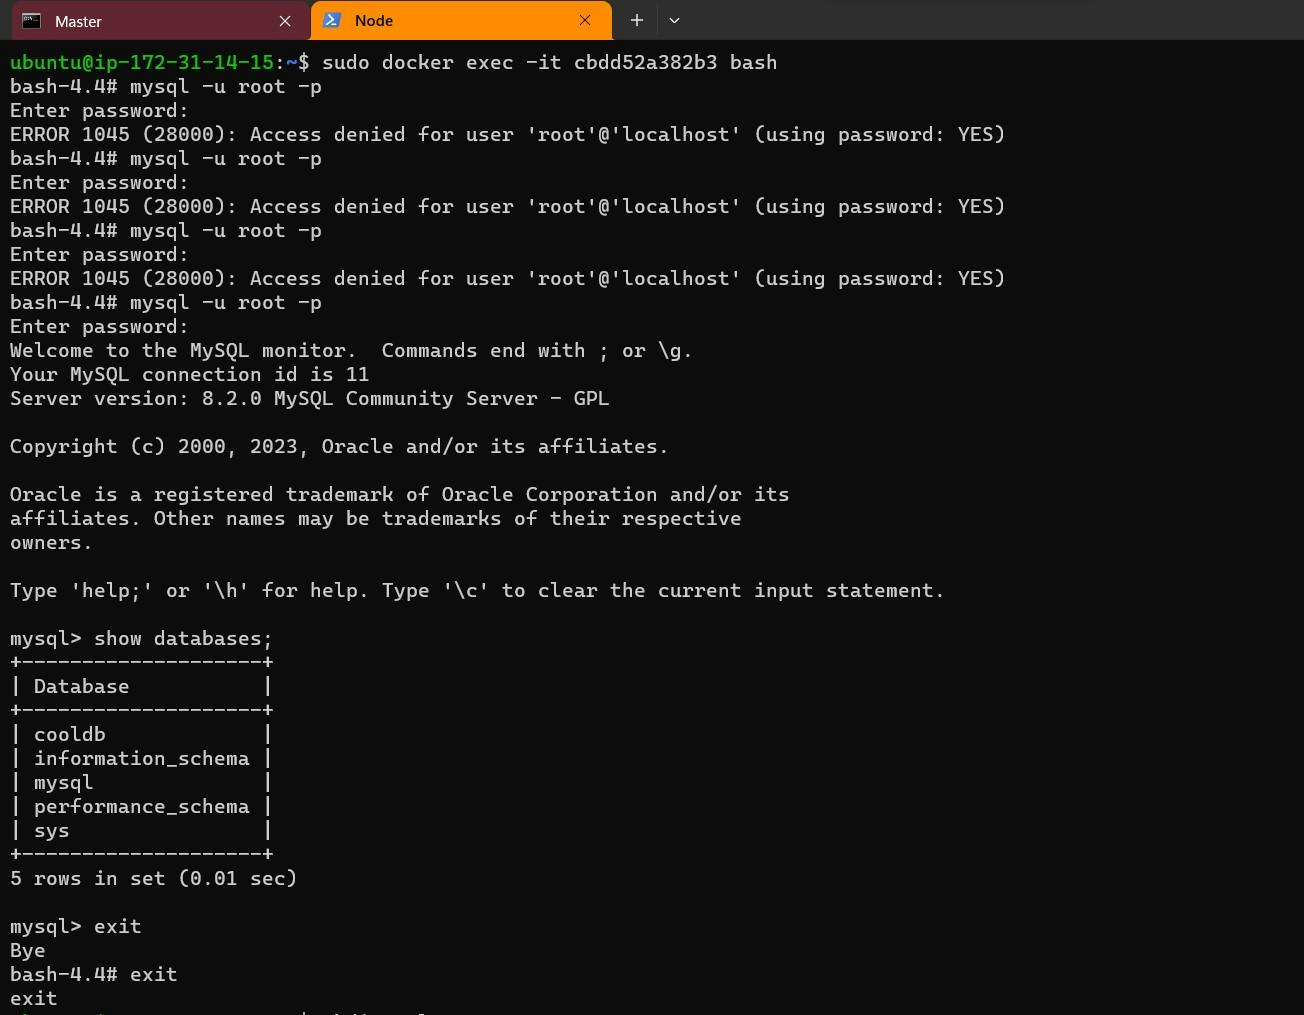
Connect to a Pod:
- Establish a connection to a Pod within your deployment using
kubectl exec -it <pod-name> -- /bin/bash.
- Establish a connection to a Pod within your deployment using
Verify Access:
- Confirm seamless access to the data stored in the Persistent Volume from within the Pod.
🔍 Journey into Verification:
Check Deployment Status:
- Monitor the deployment's status using
kubectl get deployments.
- Monitor the deployment's status using
Verify PV & PVC:
- Confirm the creation and binding of the Persistent Volume and Persistent Volume Claim using
kubectl get pvandkubectl get pvc.
- Confirm the creation and binding of the Persistent Volume and Persistent Volume Claim using
🌐 Unleashing Data Stability:
Empower your applications with persistent and stable data storage, ensuring resilience in the dynamic Kubernetes landscape.
🚀 Practical Implementation:
Check out snapshots of the practical implementation for Tasks 1 and 2 below:


Stay tuned for more captivating DevOps insights in the #90DaysDevOpsChallenge! 🚀 #DevOps #Kubernetes #PersistentVolumes #DataStability #TechLearning #ContinuousImprovement